Table of Content
Though elves have never been acknowledged as real beings, they have profoundly impacted earth's cultures. That's why In this article, I have compiled a list of 25 DIY elf ear tutorials. All of them are unique in their way, and all of them show great creativity and effort from their creators. Dust the dried latex with cosmetic powder before pulling it off the clay. Use a small paintbrush to coat the dried liquid latex with the cosmetic powder. This will prevent the latex from sticking to itself when you remove it.
To add the bell add a drop of glue to the tip of the hat and glue on bell. Fold the top of the felt down by 1/4 inch and then another 1/4 inch so that you have a folded edge. This is easily one of the most quickest and cheapest DIY Elf On The Shelf props you can make. In fact, there’s a pretty good chance you might even have what you need at home already if you do enjoy getting creative. We love all things Disney and have visited Disneyland when our girls were little , we still have their Minnie Mouse ears from that trip. If you see a dome, it means that your hearing has been damaged by a foreign object, such as a bullet or a piece of metal, and that you need a hearing aid.
How To Wire A Ceiling Fan Switch? (Explained for Beginners)
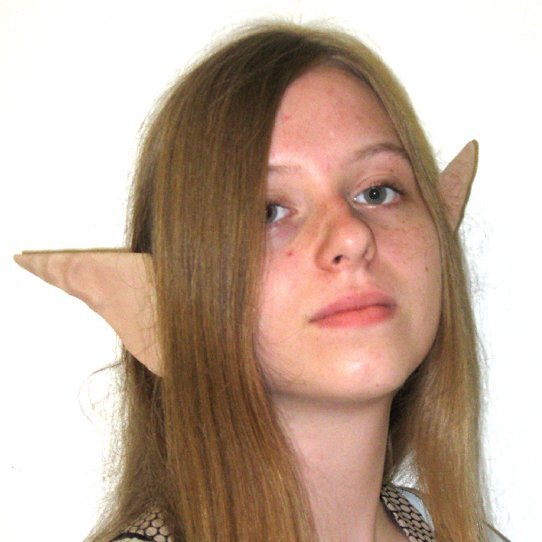
In this article, we will show you how to make your own elf ears for cosplay using only a few materials that you may already have at home. Which you can color to match your skintone and apply with adhesive like spirit gum or pros aid or even same liquid latex. Use scissors to trim ears to desired shape and if you'd trim too much you can always create a new pair of ears. Because it allows them to express something about their true selves that more mainstream make-up can’t. Squeeze a small drop of liquid latex onto the sides of your thumb, then apply a thin layer to each ear. Make sure it covers your ears and extends about ¼'' past the front edge and back of each ear.
Look into a mirror and hold the triangle up to your ear as you are shaping it. The width of the triangle should conceal the uppermost part of your ear, leaving the top point of the triangle to rest above your ear. Continue molding the clay until you reach a desired shape and size. Refrain from using tape that is wide and has a strong adhesive, like packaging tape, as this will be difficult to apply and will be hard to remove.
Making the Elf Hat
If you are allergic to latex, do not attempt to make a pair of elf ears for yourself or for someone else out of liquid latex. Coat the inside of the prosthetic with liquid latex and put it on your ear. Use the eraser on your wooden pencil to apply a thin coat of liquid latex to the inside of your prosthetic. While looking in the mirror, slide the prosthetic onto the top of your ear.
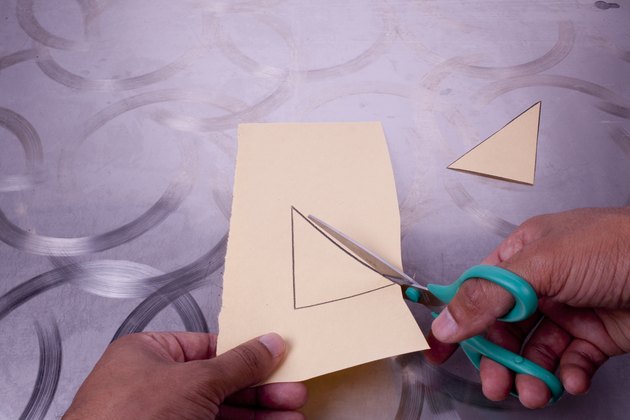
There are multiple ways to create a pair of elf ears for varying crafting skill sets. To get started, choose a method that works well for your crafting skill set and time. It consists of some colored clay, a piece of paper, it can be any color you like, and a makeup brush , which you will use to smooth down the edges of the ear.
Step 4: Folding and Gluing
Both of which can be purchased at a local craft store or online with major retailers. Elephant ears in their purest form are basically perfect, so why mess with perfection? If you're an adventure-seeking dessert aficionado, these ideas for tricked out elephant ear ideas are for you. Read on to get a tried-and-true recipe for classic Elephant Ears plus four ways to bring the bling.

Accessorize with a bow and arrow, and wear your hair in two braids. Now you have a pair of elf ears that are perfect for your cosplay. These ears can also be worn as everyday earrings. If you don’t want to use earring backs, you can simply hot glue them directly to your ears.
Instead of using solid clay here, you can easily use foil, and it still comes out lovely and less heavy. I am sure this will be your best DIY after trying this out at home. The full video tutorial below the written instructions shows you how to do it perfectly. Apply liquid latex around the edges of the attached prosthetic to seal them. Use the eraser from your pencil to apply the liquid latex. Smooth the liquid latex around the edges of the prosthetic to create a seamless transition between your ear and the prosthetic.

To create this look, you will need to wear a shirt and pants that are made of metal or leather. Accessorize with a top hat and a pair of goggles, and wear your hair in a tight bun. Add some makeup that is futuristic and industrial. To create the elf ear, use a thin, flexible strip of felt and glue it beside the ear hole.
When applying it you need to do it neatly and fast, so if there’s something wrong all you have to do is apply the spirit gum and it’ll stick perfectly! Just follow each step carefully and you will get that beautiful appearance you have always wanted to have. With so many different styles to choose from, you are sure to find the perfect elf ears for your cosplay. Whether you are looking for a regal queen, a wild and carefree elf, or a brave and independent rebel, there is sure to be a style that suits you. So, get creative, have fun, and show the world your inner elf. This style is perfect for an elf who is strong and brave.
Avoid using too much glue, as this may make the ear too heavy and cause it to pull out. Alternatively, draw the ear outline around the elongated shape and cut it out. Modeling clay can be purchased at local craft stores or online through major retailers. Make sure to follow the directions on the package to prevent damaging the ear. Making elf ears is a relatively simple process, which requires the use of liquid latex.


No comments:
Post a Comment